by
by 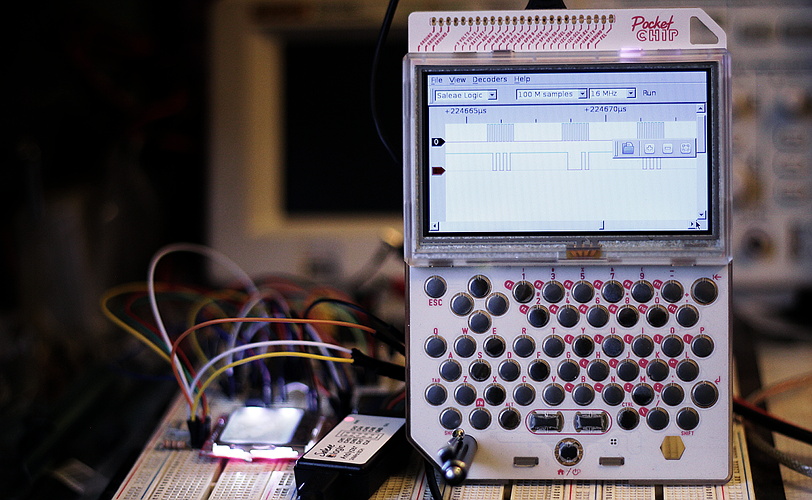
So a time ago I purchased a cheap USB Logic Analyzer from eBay that works great with a PC, and it’s been really helpful to debug several projects to date. It uses the Logic software from Saleae as hinted by the label on it, although I am not sure if the device is supposed to be a cheap knockoff of one of the (pricier) genuine Saleae analyzers, or it was just designed to be “Saleae-compatible” and use their software.
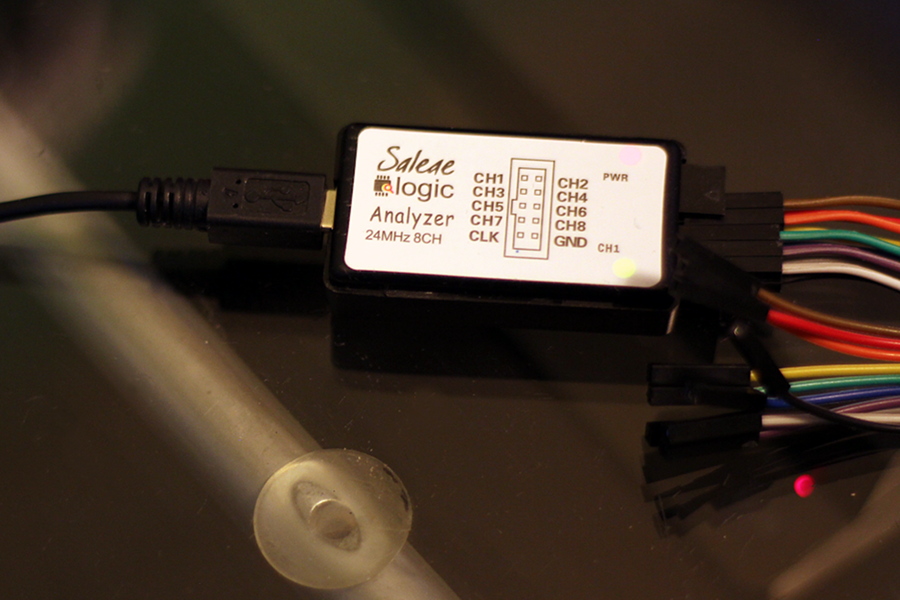
Anyway, this device is perfect for when you are doing lab work with a laptop nearby, or if you have a desktop computer at your bench, but I started wondering if it was possible to make the whole setup a bit more compact and portable for other, less ideal scenarios.
So I thought that perhaps I could use my Pocket C.H.I.P from Next Thing Co that I got from their crowdfunding campaign back in 2015. Since it’s basically a small computer running linux, and Saleae’s software runs on Ubuntu, it wasn’t too far fetched to think that I could make the analyzer work with it.
Now, spoilers; It was easier than I thought.
Disappointingly easy, in fact. I was already prepared to “git” the hell out of whatever library, support framework, driver or module this thing needed to work, and manually compile a bunch of stuff for endless hours into the night, but none of that was needed. I only had to install one, single package. So yeah, It was disappointing, but in a very enjoyable and pleasant way.
Before we begin
Before we start make sure that your Pocket C.H.I.P has working internet connectivity. I also recommend you to get a “stylus” (touch) pen and calibrate your touchscreen with it. While the default calibration is enough to hit the big buttons of the Pocket C.H.I.P “OS” with your fingers, chances are that it won’t be precise enough to hit small menu items in the software we will need to use. You can follow this guide to perform the calibration process.
I’d also advise you to run sudo apt-get update to make sure you’ll be fetching the latest software from the C.H.I.P repositories during installation.
Installing the software
We are going to use sigrok, a popular logic analyzer / oscilloscope software for linux.
To install sigrok on your Pocket C.H.I.P just open a terminal and run sudo apt-get install sigrok.
That’s it. That’s all you need to do. I rebooted my Pocket C.H.I.P just in case, and after that was done I was ready to (sig) rock.
Using it
Now you can connect your logic analyzer and execute pulseview from a terminal (it comes with the sigrok software). If you want to check whether your analyzer was recognized by the system you can run lsusb, before running pulseview. It should be listed as one of the connected USB devices. Alternatively you can try sigrok-cli --scan to be extra sure that sigrok has recognized your device.
Now, granted, Pulseview’s UI barely fits in the tiny low-resolution screen of the Pocket C.H.I.P, and I believe there are some icons that are not being drawn, (See update by the end of this post!) but it’s quite usable as it is.
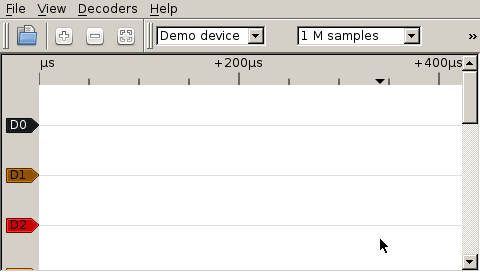
In the dropdown box where it says “Demo Device” you should see “Saleae Logic” as one of the options. If that’s not the case go to “File>Connect to Device…” and select the fx2lafw driver. Scanning for devices should make the “Saleae” analyzer appear in the list so you can select it later on the box here.
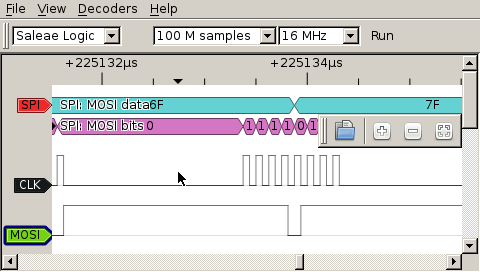
Once you have done that you can set the sampling frequency and sample buffer size, connect the analyzer probes to your circuit, and hit Run. You can also take this opportunity to re-arrange the menu bars so it’s more usable on the tiny screen. I like to keep the box with the zoom controls floating because it doesn’t obstruct much of the view, and makes zooming in/out easier. You can dock the bar on the left side, vertically, but it’s a bit of a struggle to get it there.

There are protocol decoders that you can select from the top menu, that will help you decipher and make sense of the signals on the screen, and you can rename and move the signals around to customize your view, so I’d say this is a reasonably good solution for occasional use on the field or if you don’t have space on your bench for a computer next to your work area.
Despite not being perfect, it’s already 10 times better than using my portable 4-ch DSO with the “logic analyzer app”, which gives you awkward controls and barebones UI with no decoding features (works, though, but it’s far from being enjoyable), so I’m pretty pleased with the results. It doesn’t beat connecting the analyzer to a full-blown computer but it definitely gets the job done.
It’s also interesting that Sigrok (and Pulseview) supports different capture devices from many manufacturers, and it actually recognizes my Rigol DS1052E DSO as a 2-channel source. But testing how that works, and whether it adds something to the experience, is material for another post, and another day.
Update!
I managed to solve the “missing icons” issue. You only need to install the libqt4-svg package with sudo apt-get install libqt4-svg.
With that lib installed the few icons that were not being shown will finally appear.
Now, this is a program that will certainly benefit from a bigger screen, so since I have another C.H.I.P I think I will put it in a small case with a 5″ 800×480 screen, install sigrok on it, add some external shortcut keys, and make myself a nice linux-based Logic Analyzer (which may perform other functions later, as it’s also a general-purpose linux computer).