by
by It took me a really long time to do this second part of my Pi-based Logic Analyzer project, mostly because of two things; the first one being that at one point (after I had pretty much all the case design, extra hardware and software tweaking done for my RPi1) I decided to switch to a Raspberry Pi 3, which of course meant discarding a lot of work and starting again but with the RPi3 in mind.
Why? Because I figured that my device was getting needlessly bulky (the case required extra room for a small fan (for the overclocking), extra width for the full-size SD card, and extra thickness due to the back-facing P5 connector, etc), and it would have been almost impossible for others to replicate this project (because I was using the old Pi1 Rev.B board, which is discontinued) so using a more modern Pi made sense. The physical layout of the Pi has stayed the same since the latest revision of Pi1 I believe, and -sans the position of the status LED- both the Pi2 and Pi3 are identical and completely interchangeable for the purposes of this project.
The second reason for the delay was that in an spectacular display of stupidity, I managed to fry my Waveshare TFT screen when I was done with the whole setup and designs for the Pi3, so I had to order another one online, and wait until it arrived, which took a long time.
Picking up from where we left
So, the RPi3 I’m using now is running exactly the same software and configuration as my old Pi, and I decided to use fbcp (check the “optional” part at the end of Part 1) to have more resolution and also to have simultaneous HDMI output, so don’t be surprised if you see bigger screenshots here.
Waveshare versus KeDei
Talking about resolution: My new TFT screen is not a Waveshare display like the one I had before. It’s a “KeDei” 3.5 TFT, which seems to be slightly faster than the Waveshare screen, but requires a manufacturer-provided kernel with the LCD driver baked in. This sucks because I’m stuck with kernel 4.4.50, which the manufacturer ships with a pre-made image of Raspbian Jessie. Luckily the kernel can also be installed on Raspbian Stretch, if you download the LCD_show_v6_1_3.tar package from their website.
Since the LCD driver is now loaded by the kernel itself, the LCD is now fb0, and fb1 is the HDMI framebuffer. This means that for fbcp to work as intended, I had to modify its source code before compiling it, so it would constantly copy from fb1 into fb0 and not the other way around. This can be done changing the following lines in main.c:
/* OLD LINE: display = vc_dispmanx_display_open(0);  */
display = vc_dispmanx_display_open(1);
.
.
.
/* OLD LINE: fbfd = open("/dev/fb1", O_RDWR); */
fbfd = open("/dev/fb0", O_RDWR);
I also had to edit the 99-fbturbo.conf file so X11 renders to fb1 instead of fb0.
The last annoying thing about the new LCD is that it seems to be a couple of millimeters smaller than the Waveshare display, and unfortunately I had already designed and laser-cut the acrylic case with the old screen in mind, so the new screen “floats” a bit in the front panel.
I also learned that depending on the LCD you are using, a few things from the process will be quite different. For instance the touchscreen on this KeDei LCD uses libinput instead of evdev. Because of this, the input config file is called 40-libinput.conf instead of 10-evdev.conf. If you want to have right click emulation you need to install evdev (sudo apt-get install xserver-xorg-input-evdev) and change the driver the touchscreen uses to evdev, like this:
Section "InputClass"
        Identifier "libinput touchscreen catchall"
        MatchIsTouchscreen "on"
        MatchDevicePath "/dev/input/event*"
        Driver "evdev"
        Option "EmulateThirdButton" "1"
        Option "EmulateThirdButtonTimeout" "500"
        Option "EmulateThirdButtonMoveThreshold" "30"
EndSection
Physical layout considerations (for the Waveshare LCD)
[ NOTE: Please keep in mind that the changes below are only needed for the Waveshare screen. The KeDei display does not need to be rotated, and it’s not loaded from the /boot/config.txt file anyway ]
To have the HDMI port connector facing the top side of the unit I had to set the LCD rotation to 270° in the device tree overlay parameters, inside /boot/config.txt so my current config looks like this:
dtoverlay=waveshare35a:speed=2400+0000,fps=30
I also took this opportunity to reduce the frame updates to 30, because to be fair we don’t even need 60fps for running programs, and we are probably just taxing more the poor processor with that task.
Of course because of the change in rotation, the touchscreen needed to be calibrated again, which I had to trigger remotely via ssh with DISPLAY=:0.0 xinput_calibrator
Other changes
In the same /boot/config.txt file, I added some extra lines to make sure our Raspberry Pi was not wasting time uselessly at boot:
# Other options to make sure the RPi is booting as fast as it can.
boot_delay=0
boot_delay_ms=0
disable_splash=1
To further improve the Pi boot time, I disabled the serial login console. To do this I removed the console parameters from /boot/cmdline.txt:
#dwc_otg.lpm_enable=0 console=tty1 console=ttyAMA0,115200 root=/dev/mmcblk0p2 rootfstype=ext4 elevator=deadline rootwait fbcon=map:10 fbcon=font:ProFont6x11 logo.nologo
dwc_otg.lpm_enable=0 root=/dev/mmcblk0p2 rootfstype=ext4 elevator=deadline rootwait fbcon=font:ProFont6x11 logo.nologo
And also commented the T0 getty line in /etc/inittab so it looks like this:
#Spawn a getty on Raspberry Pi serial line
#T0:23:respawn:/sbin/getty -L ttyAMA0 115200 vt100
Just to be sure I also ran sudo systemctl disable serial-getty@ttyS0.service.
After that, I disabled the X screensaver and the script that moves the mouse pointer to the launch button from the LXDE autostart script (.config/lxsession/LXDE-pi/autostart) so it now looks like this:
@lxpanel --profile LXDE-pi
@pcmanfm --desktop --profile LXDE-pi
#@xscreensaver -no-splash
#@point-rpi
Hardware buttons
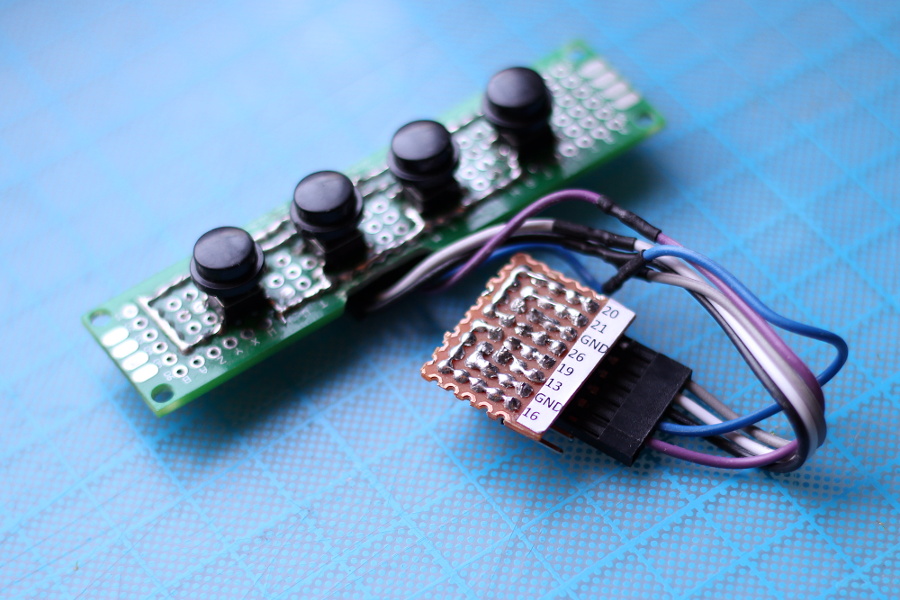
I want to have a few physical buttons as shortcuts for a few tasks. I’ll add 4 of them using the GPIO pins of the Raspberry Pi. For that I made a really awful board with buttons using a thin strip of perfboard:
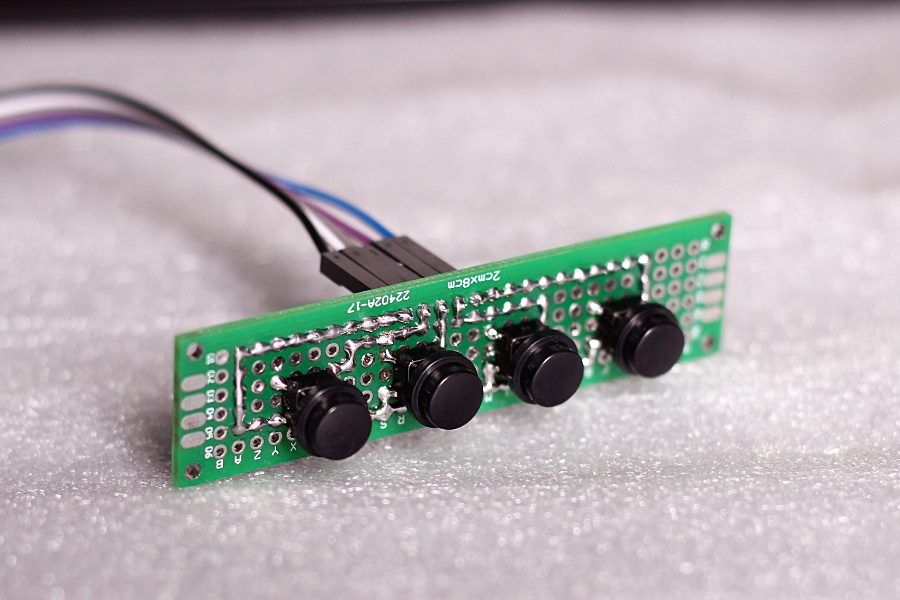
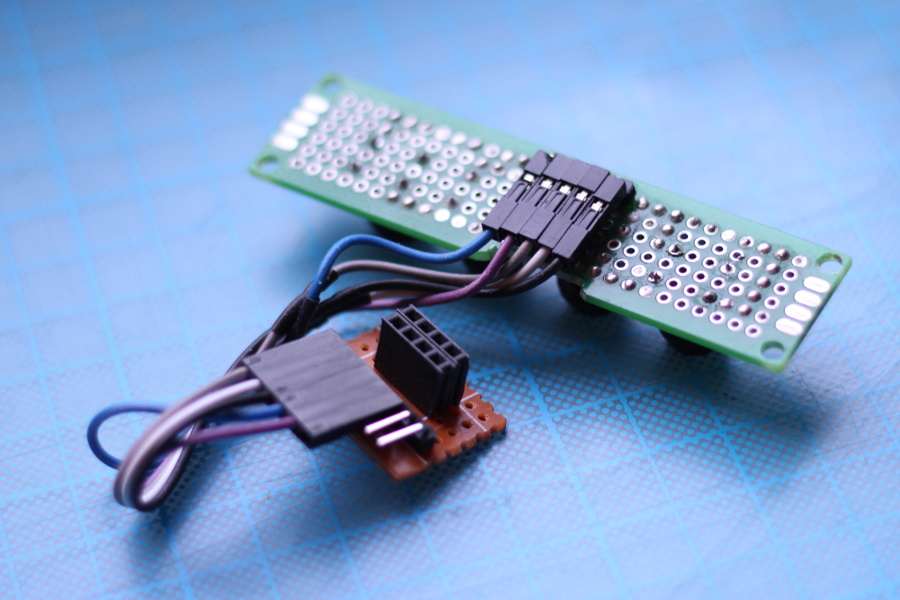
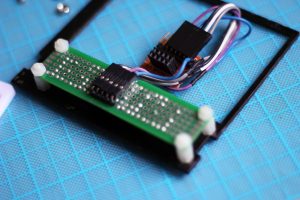
It’s nothing out of the ordinary. It’s 4 buttons and a 5-pin connector. Each switch has one side connected to an individual pin from the connector, and the other side of all the switches go to the fifth pin, which can be connected to either ground or +3.3V (will depend on whether you enable the internal pullup or pulldown resistors for the GPIO pins). I decided to use the pullup resistors so the common connection for the buttons goes to GND on the board. For the sake of convenience I also made a small board that I can install between the Raspberry Pi and the LCD screen, that makes it easier for me to connect this board later.
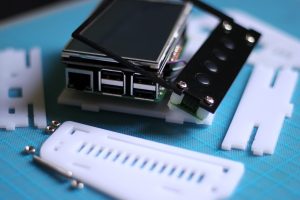
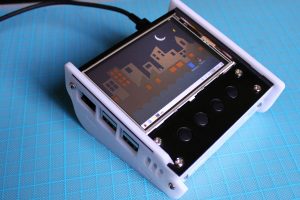
Acrylic Case
I also designed an acrylic case for the whole thing and, as usual, here’s a ZIP archive with the SVG file. It’s designed for 3mm acrylic.
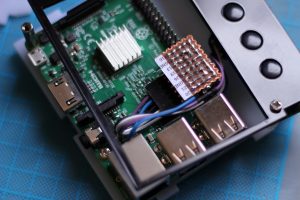
Now I guess it’s the perfect time to put a bunch of pictures of the assembly process that hopefully will do a better job at explaining how everything fits together than I could possibly do with words.

Writing a script to use the buttons
For the time being I want the buttons to perform the following actions:
- Take a screenshot
- Toggle virtual keyboard (important for text input)
- Show the shutdown menu,
- Minimize all windows (so we go back to the desktop)
I would have loved to have a button to start/stop capture in PulseView, but a hotkey for that operation was only introduced in Pulseview 0.3 and we are running 0.2, which is the only version available from the Raspbian repos. I tried compiling a more recent version on my Pi but there’s a lot of stuff you need to compile by hand, with missing libraries everywhere, so I gave up.
I will still need to simulate key presses for what I want, though, so I had to install xdotool anyway, via sudo apt-get install xdotool.
The button mapping can be changed later, and all of these actions can be performed using the touchscreen, so it’s not critical to have any of that. It’s just a matter of convenience.
To achieve what I wanted, I created a script with sudo nano /usr/local/bin/custom_gpio.py with the following content:
#!/usr/bin/env python

import RPi.GPIO as GPIO
from time import sleep
from subprocess import call
#GPIO Button Mapping
BTTN_1 = 26
BTTN_2 = 19
BTTN_3 = 20
BTTN_4 = 21

GPIO.setmode(GPIO.BCM)
GPIO.setup(BTTN_1, GPIO.IN, pull_up_down=GPIO.PUD_UP)
GPIO.setup(BTTN_2, GPIO.IN, pull_up_down=GPIO.PUD_UP)
GPIO.setup(BTTN_3, GPIO.IN, pull_up_down=GPIO.PUD_UP)
GPIO.setup(BTTN_4, GPIO.IN, pull_up_down=GPIO.PUD_UP)
try:
 while True:
   if GPIO.input(BTTN_1) == 0:
     # Take a screenshot of the whole screen
     call("xfce4-screenshooter --delay 0 -f", shell=True)
   if GPIO.input(BTTN_2) == 0:
     # Toggle the virtual keyboard we installed
     call("/usr/bin/toggle-virtual-keyboard.sh", shell=True)
   if GPIO.input(BTTN_3) == 0:
     # Show LXDE's shutdown window
     call("lxde-pi-shutdown-helper", shell=True)
   if GPIO.input(BTTN_4) == 0:
     # Toggle show desktop
     call("xdotool key ctrl+alt+d", shell=True)

   sleep(0.1)

finally:
 GPIO.cleanup()
You’ll need to make it executable with sudo chmod +x /usr/local/bin/custom_gpio.py
Then add a line at the end of the LXDE autostart script with nano .config/lxsession/LXDE-pi/autostart:
@custom_gpio.py
This way our script will run when LXDE starts. You can use this method to run Pulseview when the machine starts, too.
More config?
Since we now have a button to switch to the desktop, we can customize the taskbar (right click on the taskbar->Panel Settings->Advanced) and uncheck “Reserve space and not covered by maximized windows”. With this option disabled, our windows can (and will, thanks to the openbox config we made in the previous part) use the whole screen.
Final Thoughts
With the current scripts and configuration files this machine is a standalone mini-linux terminal with toggle-able on-screen keyboard and loaded with a logic analyzer software. Quite a useful machine to have if you don’t have a computer right on your work bench. The only disadvantage of this setup for me is, is the lack of an updated version of Pulseview for the Pi. But oh well, a small price to pay for the convenience I guess.