by
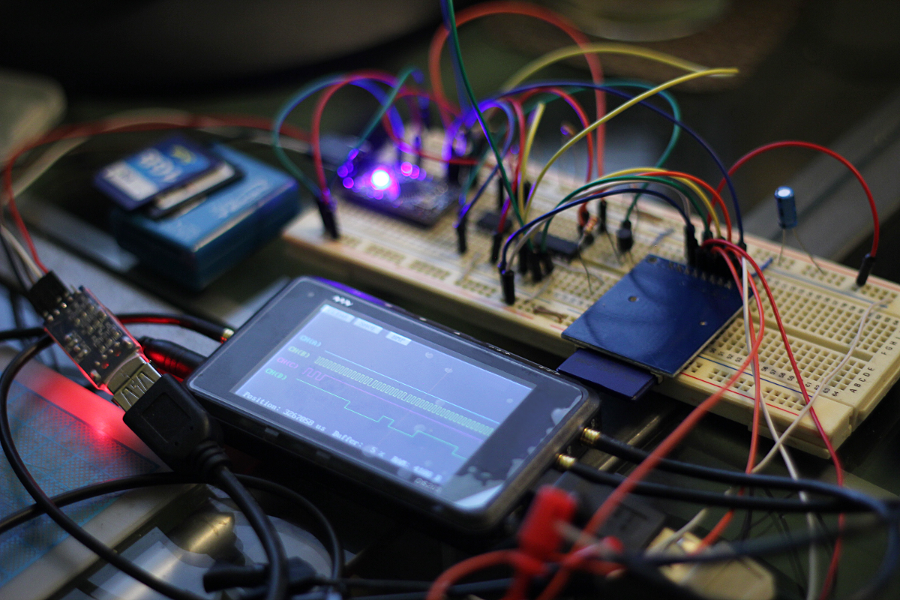
by So in my first adventure with the STONE displays I wrote a simple Arduino library to communicate with them, and ported the firmware-side of the included example to my library to make sure it was working properly.
However, writing that library was not the end goal. I wrote it to make it to get familiar with these displays and at the same time to make it easier for me (and other hobbyists) to use them with Arduino boards, ESP32, etc. I obviously want to use the screens in my projects, so this time I decided to start one from scratch.
Now, full disclaimer: I got this screen for reviewing purposes, and I decided to measure its usefulness by actually using it on a project. All the work that I have done so far is to give a full honest assessment of how well these displays work, and to help other hobbyists who want to use them as well.
The Basics
The STONE TOOL Software for these screens gives you a wide array of controls that you can add to your UI, that can automatically handle things like text input, setting internal variables, handling system time, changing the current view, etc. The “Tool Software Instruction” PDF included with the display does a pretty decent job introducing all the possible elements and how to configure them.
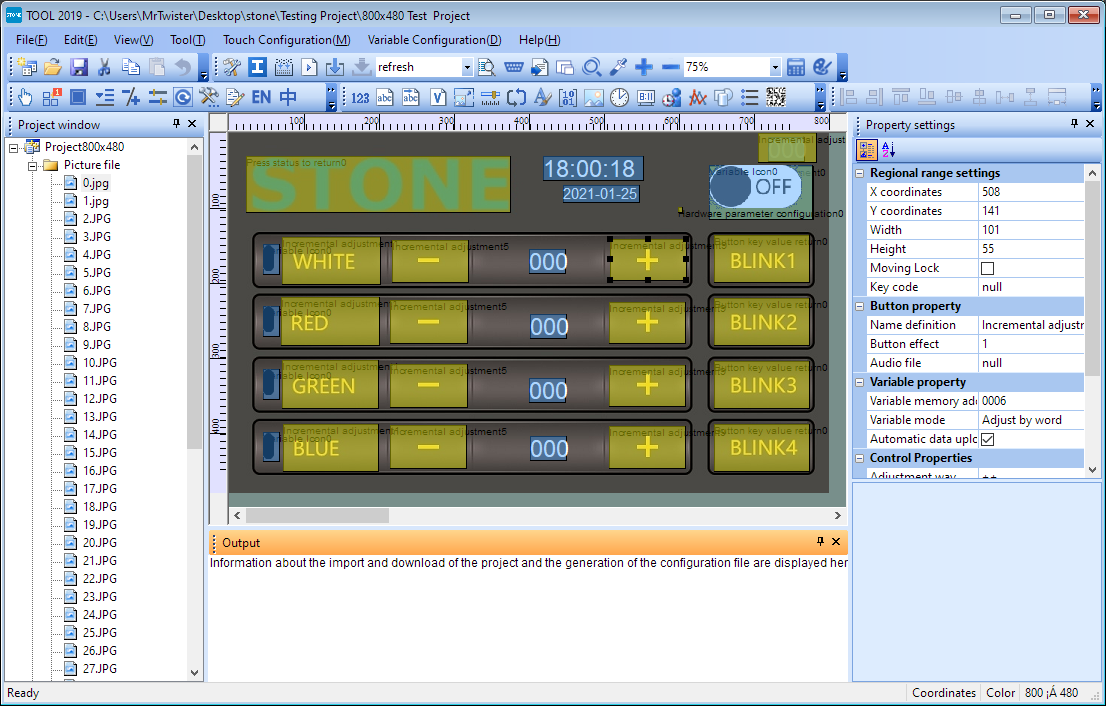
The feature I used the most, however, was binding basic controls to “user-defined variables”, which are variables stored in the memory of the screen and can be linked to the UI controls for both input and output. With this, you can make buttons that will change or display the value of a variable, or whose visibility will depend on its value. You will see examples of this in the next sections.
Designing the UI
First we need to define how we want our screens to look like. For this I drew the layout in Inkscape, aiming for a single screen interface with a simple graphical language, and once I was happy with the layout, I exported the individual images that make the whole thing.
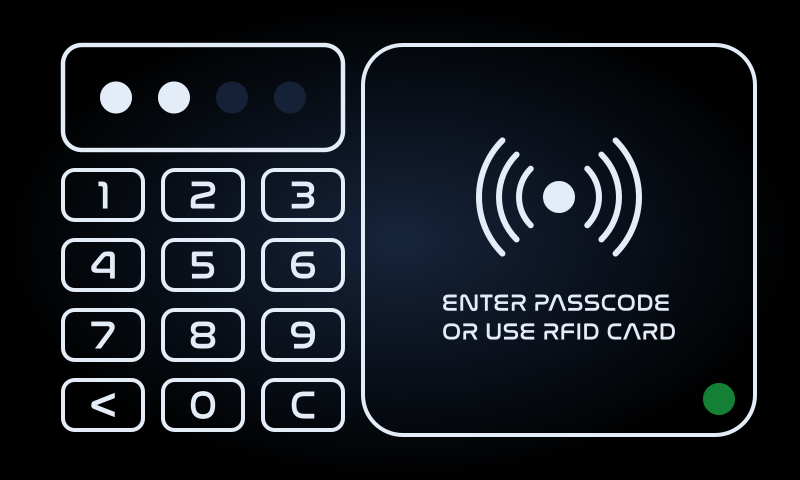
I also created a couple of sound effects in Audacity for feedback (key presses, login success and failure).
Implementing the Design in the STONE Software
As hinted earlier I was pretty much able to implement the whole thing by just binding user variables to UI elements.
Static backgrounds from my layout were exported as JPG, and dynamic elements (mostly indicators) that would be laid on top of it were exported as 8-bit PNG (that I later need to import as “icons” in the project).
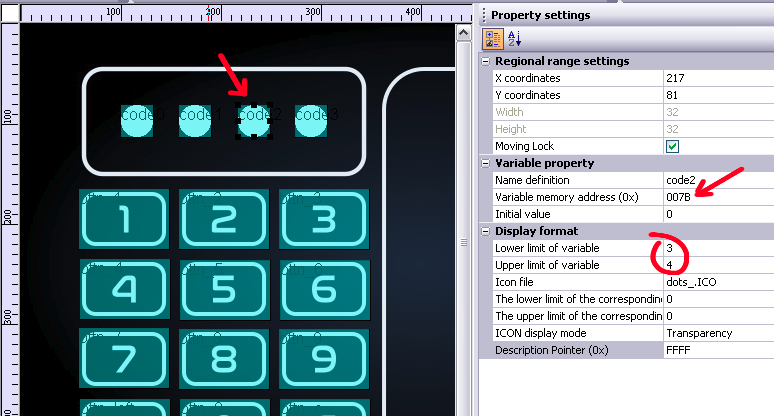
The dots that appear as you type the PIN code are linked to a single user variable (0x007B) that will hold the length of the currently stored password. They are set so if the value of that variable is 1, only the leftmost dot will “light up”, if it’s two then the first 2 dots will be shown, and so on.
A similar strategy was used for the Locked/Unlocked indicator in the bottom right corner. The dot will cycle through the 3 possible states (disabled, locked and unlocked) based on the value of another variable (0x007C).
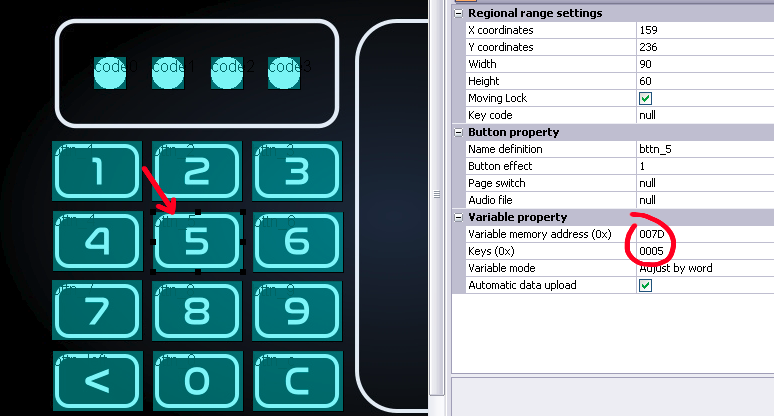
Finally, all the buttons in the keypad have been configured to set a variable (0x007D) to the value of the key that was pressed. These buttons will also send an event to the microcontroller indicating that a button was pressed.
I also did a greyed-out version of the whole UI (one where every element looks “disabled”) that I would show for a second in case of access denied. I’m also reusing that screen to set the “button effect” of each keypad digit. By doing so, the display will show the “greyed out” button when it’s pressed, giving a reasonable visual feedback (It basically cuts the button’s rectangular area but from the other picture, and draws it while the button is pressed).
The sound effects were also added to the project so my code can tell the screen to play them on cue.
Writing the firmware
Thanks to my library the code was super easy to write. I only needed to listen for the “events” from the keypad buttons and update the variables for the status indicators. In case of access error, I’m telling the screen to play the “error” sound effect, and temporarily “disable” the UI by switching the view to the greyed-out panel for a second before returning to the regular view.
In case of success the lock indicator is updated, and a “success” sound effect plays.
The RFID portion of the code was also pretty straightforward, thanks to the library written by Miguel Balboa and maintained by the Arduino community.
You can find the all the project files and firmware in this Git Repository.
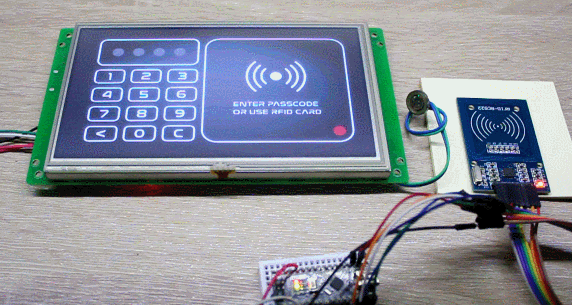
The final result
Here’s two small clips of the whole thing in action.

I’d say it runs pretty well, wouldn’t you agree?
I definitely want to connect this to an actual electronic lock, but I first need to get one that will fit my door. After that I think I’ll add other features like an emergency mechanism (in case of failure) and a 3D-printed enclosure.
Closing Words
I’m quite pleased with how easy it was to put together the UI using the STONE display. The result is visually nice (limited to my art/design skills), works smoothly, and uses almost no processing power from the Arduino.
I’m yet to see how the display will perform with a larger number of of dynamic elements on screen, or with more complicated UIs, and there are a few things that weren’t as straightforward as I would have liked, but for the kind of projects I have in mind (control panels, dashboards, etc) I think these screens will definitely allow me to create good-looking graphical interfaces with minimal effort.