 by
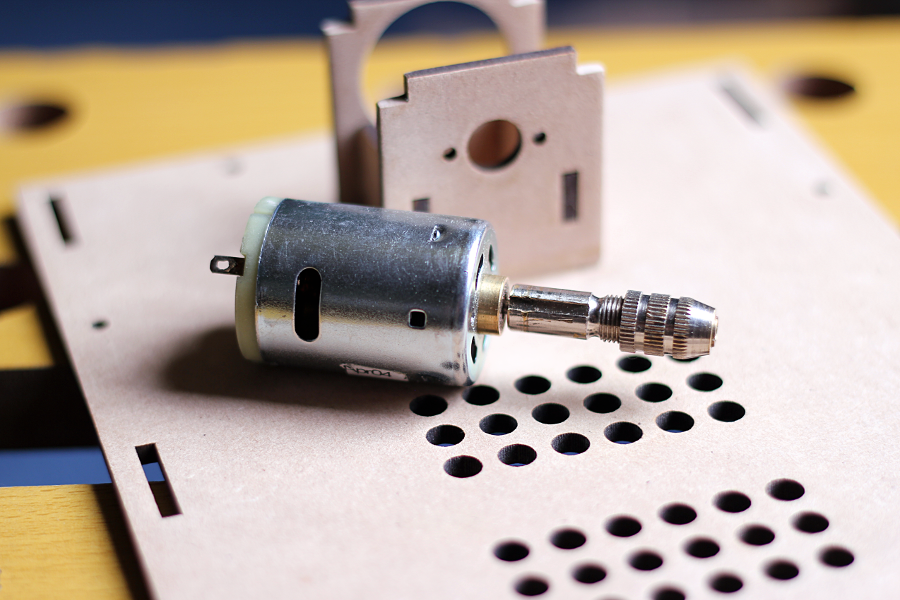
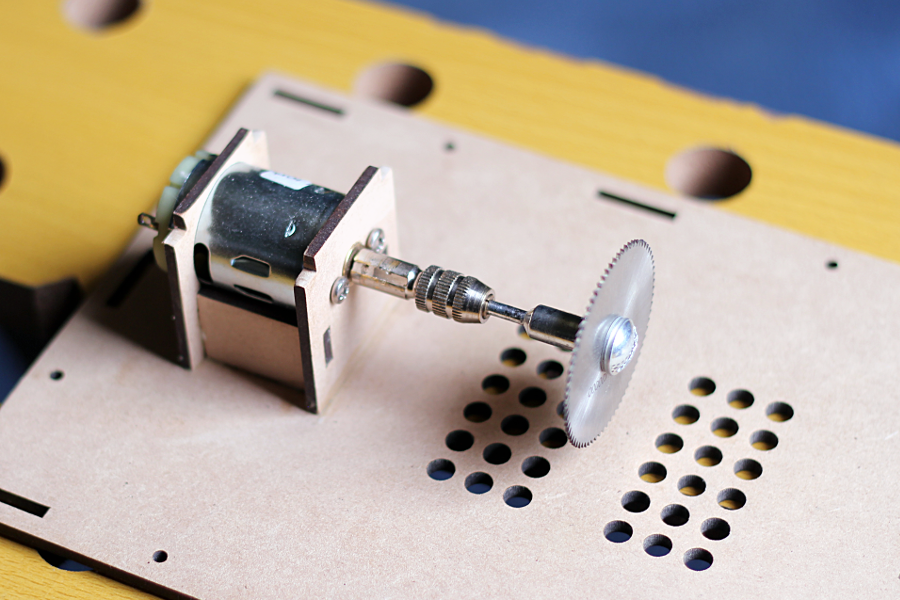
by Cutting PCBs down to size for each project has always been a problem for me. I don’t have a bench saw, so I’ve been doing this by hand until now. Despite the number of boards I’ve made, I still lack the dexterity to do perfectly straight cuts with a regular hacksaw, and my success with other manual methods has been equally limited. Like a year ago I stumbled upon a small a table saw on dealXtreme which I was tempted to buy but was kinda too expensive for me. My search continued until a few months ago, when I realized that I could make one myself, using a small motor I salvaged from a cheap $10 dremel-like tool that I once had. I wasn’t sure this was going to work, but decided to give it a go nonetheless.
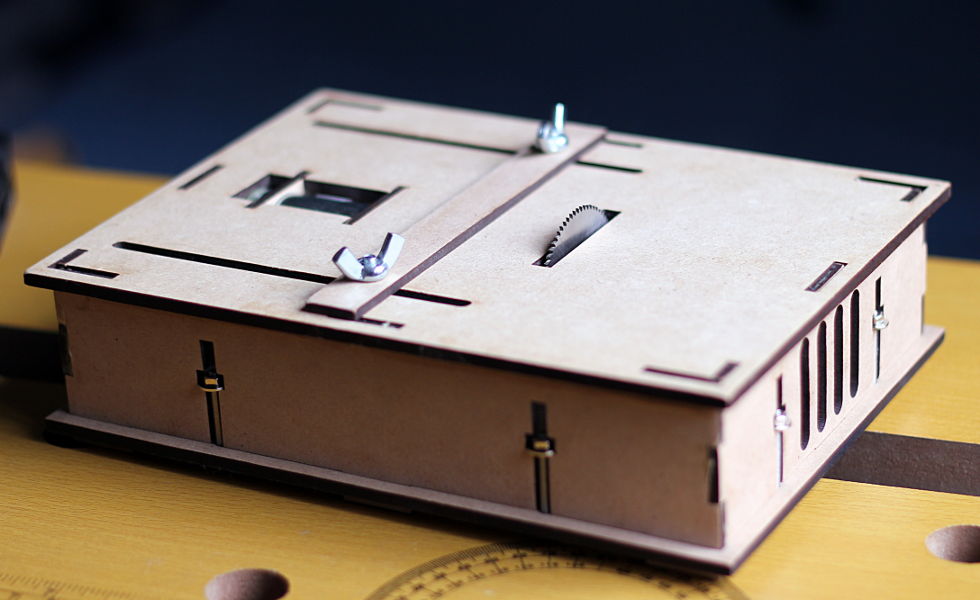
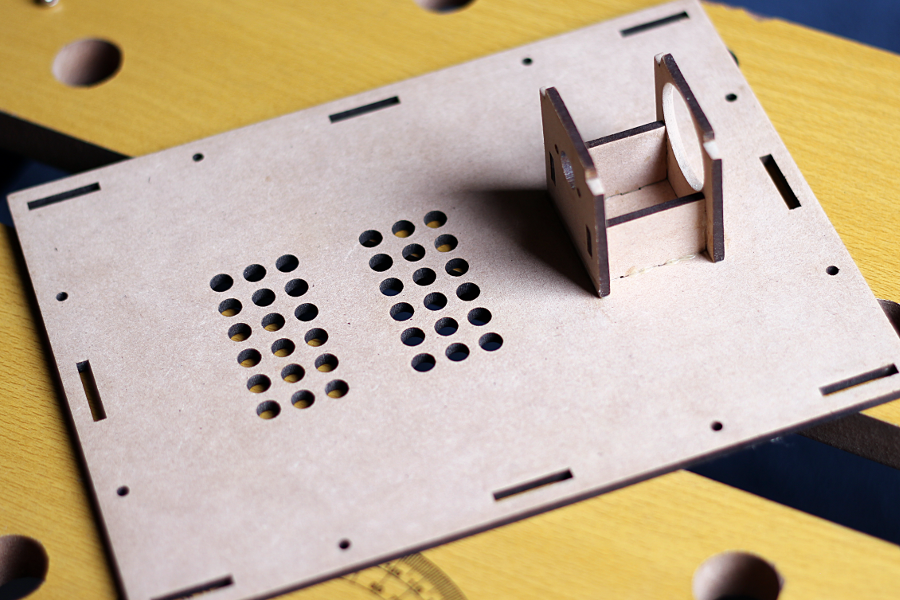
I designed the whole thing from scratch around the motor and components at my disposal, but I integrated ideas I saw (heh) in similar projects online, like the adjustable cutting “guide” or the vent slots. It’s not a complex machine by any means so designing this didn’t take long.
Of course my design has its flaws; The pattern I followed to add bolts and nuts to the laser-cut pieces is pretty common and has been widely used in many projects. The problem is that in most of these projects, the bolts are placed in such a way that you can easily grip the hex nuts from both sides with pliers while tightening the bolt with a screwdriver. Since in my design the top deck is glued to the side walls, there’s no way you can get pliers from any direction to hold onto the nuts when you insert and tighten the bolts. You need to be very careful and hold them with tweezers or precision pliers from outside, which is incredibly frustrating and hard to do. To make things easier for me I ended up gluing nuts and washers inside the slots using a two-part adhesive so I don’t have to hold them in place myself when tightening the bolts. Surprisingly it works.
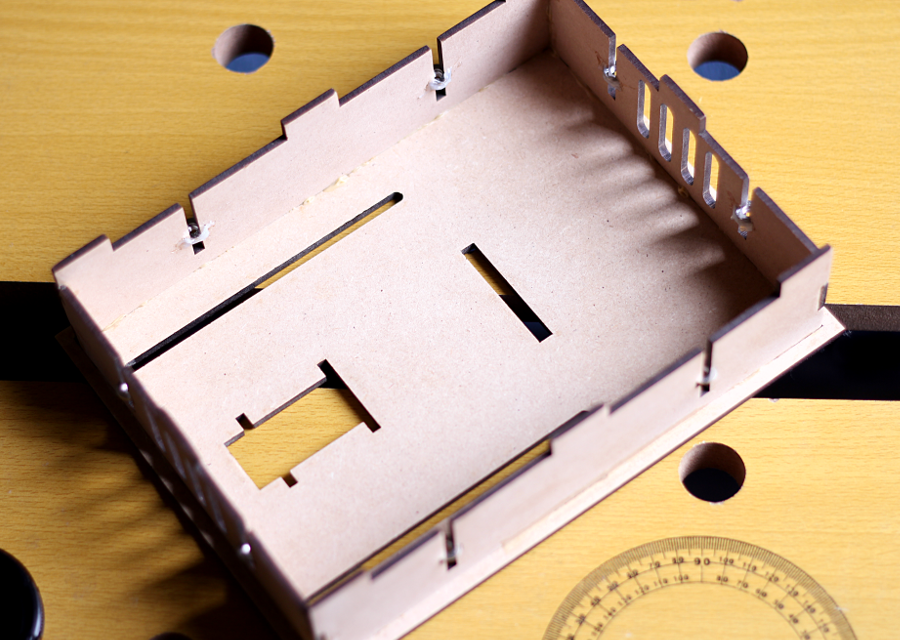
The pieces are quite self-explanatory but I’ve added some instructions in the SVG file. As usual I’ve included a DXF render too: DIY Table Saw (SVG, DXF)
Please bear in mind that I’ve still not decided on the electronics I’ll use for this. For the time being I’m using my lab power supply, but I will eventually either build a dedicated controller or just settle with a fixed power supply or an old laptop adapter. For this very reason you’ll find in the diagrams no holes for switches, cables, etc. Since most panel-mount components require simple holes, I’ll drill them as I need them, and according to what I end up using. What you will definitely need though, is a flyback protection diode across the terminals of the motor and a small ceramic capacitor for stability. I soldered both to the motor terminals before closing the whole thing.
Also check that you are providing enough power to the motor. I didn’t know the voltage rating of mine, so during my early tests I started with 6-8V and the motor began vibrating so wildly that the blade made small dents inside the slot. Taking the voltage above 12V reduced the vibration almost to zero and made the whole thing run smoother. At 18V I was able to cut through PCBs with no problem.
If you want to build one yourself I think you can use this motor I found on eBay, which seems to be designed for this kind of project and looks really close to the one I’m using.
I’ll leave you with a video now of the saw working:
I’m quite happy with the result. I think the only modification it needs is a way to be clamped down to the table, but I think that I can do that without further modifying the design. I can -for instance- add a “bed” that runs under the bottom side (without obstructing the vent/exhaust holes, bolts, etc) that protrudes to the sides so I can put the clamps there. This piece could be attached to a couple of the existing holes in the bottom plate.
UPDATE: Several attempts later were made using the fold-able woodworking bench itself (whose surface can act like a clamp) with the plastic stoppers that came with it to keep the machine in place, and it worked amazingly well, so I don’t think I’ll modify my setup.
Another thing I forgot to mention: If you are going to cut PCBs I found that cutting the boards copper-side-up gave cleaner results.


Hi,
Thanks for this nice tiny saw. I have a couple of questions for you:
1. Which software did you used to design the cut parts?
2. Which material is this and what is the thivckness?
3. What is the diameter of saw blade attachment.
4. Where did you laser cut the parts? online or locally?
Best Regards
Hi!
Sorry if I missed that information in the post! Here’s the answers:
1.- Inkscape. It’s free and works great for doing vector designs.
2.- 3mm MDF. Will also probably work in acrylic and other materials but thickness is the relevant part. I’m sure you can cross-check with the design that all slots, tabs and assembling cuts are 3mm.
3.- Sadly can’t tell now. It’s been a while and this project was dismantled. It has to be smaller diameter than the slot cut in the surface of the design. You can modify the size of the blade slot if you plan on using a smaller or bigger blade.
4.- At a local hackerspace. Haven’t tried online services.
Thanks for commenting!
If you want the tool to enter the wood in some specific angles then this is what you can use. It can cut the wood at many different angles other than 90 degrees. After getting the wood it can even rotate within the frame.
This was not meant to be a full professional saw though. Just like similar devices currently in the hobbyist market, this is a small tool for custom-cutting thin pieces of wood (and plastic) to size. Particularly PCBs.
In woodworking, the term circular saw is most commonly used which is refers to handheld and electric circular saw are designed for cutting wood with other blades they are used for cutting other material.
Hi,
The link “DIY Table Saw (SVG, DXF)” don´t work
Thanks for your examples and help.
Hi!
Thanks for letting me know! Apparently the path to the file was not properly set. I just fixed it. Sorry!