 by
by 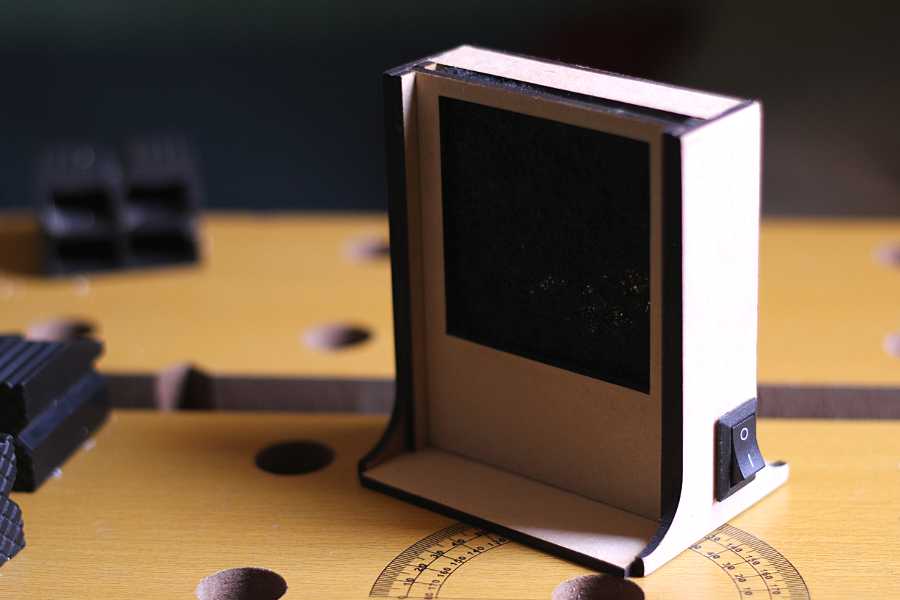
If you have any experience with a soldering iron, or soldering electronic components in general, I’m sure it will come as no surprise for you that the “fumes” produced by the process are not exactly good for your health. They can be quite harmful in fact (** depends a bit on the chemical composition of the solder you use). Even if they weren’t, they are -at the very least– annoying as hell. They always find their way to your eyes and throat in the most unpleasant ways.
I discovered some time ago that a device specifically designed to cope with this issue existed, and it’s been in the market for a quite a long time. This unbelievable product of heaven-sent technology and engineering is unsurprisingly called Soldering Fume Extractor (I bet you didn’t see that coming) which is nothing but a pompous name for a small desktop fan with an active carbon filter.
These devices are sold for $40-$200 (models ranging from “basic” to “unnecessarily fancy”) which I don’t really think is particularly cheap for what they truly are (although if you are really into soldering and not really into the whole DIY thing, $40-$50 is a small price to pay for a basic model that gives you a happier and possibly healthier soldering experience ).
To make one I was obviously going to need a filter, which I thought it was going to be hard to obtain. Luckily I was wrong, as I found a set of 17.5×14 cm active carbon filters in a local hardware store for like $3 a pack of 3.
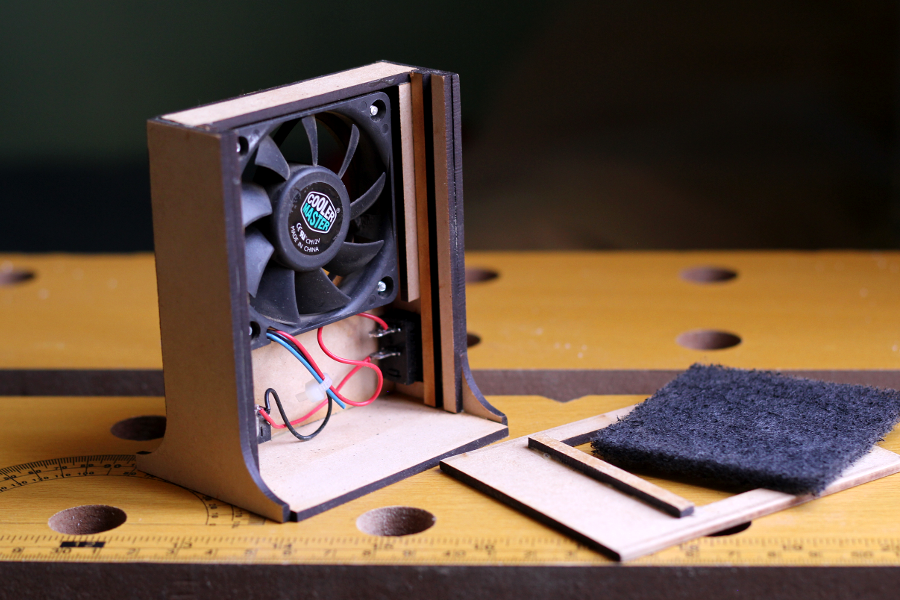
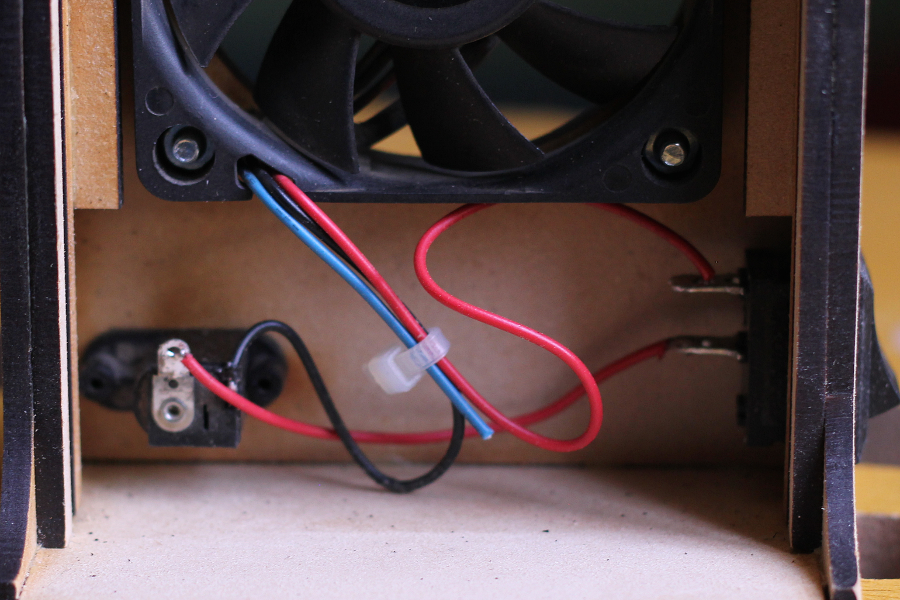
To build this fume extractor I used a small 12V computer case fan from an old PC, a DC barrel jack that I probably salvaged from something else (but it’s been too long to actually remember where I got it from) and a rocker switch from my box of switches and buttons. For the “case” I used a 30×30 cm piece of 3mm MDF, which was also incredibly cheap (~ $0.2).
A quick note on the DC barrel jack: The exact socket type/model I got is -apparently- incredibly rare (at least at the time of writing). I was unable to locate it anywhere outside of the Connectors catalog from Shokai Far East, so unless you can get one from them (or you happen to have one of these lying around) you’ll need to modify the drawing to fit a more commonly available panel-mounted DC barrel jack. You could also forget about having a DC power jack, and solder the cables of a 12V adapter directly to the fan and switch, and make it a permanent part of your fume extractor.
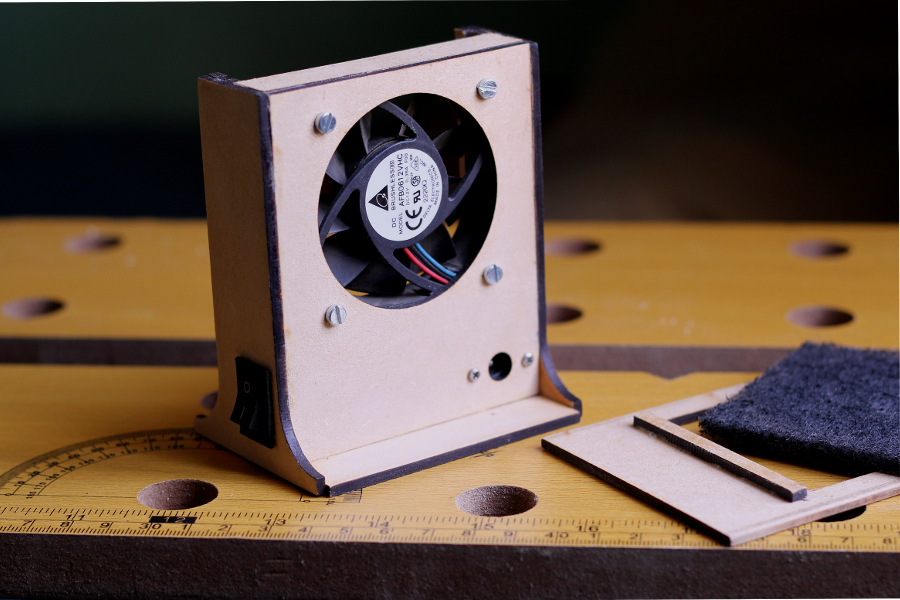
The structure of this extractor is fairly simple and it was designed to be reasonably easy to build, easy to open (for repairs/upgrades later) and with easy/immediate access to the filter in case I need to change it.
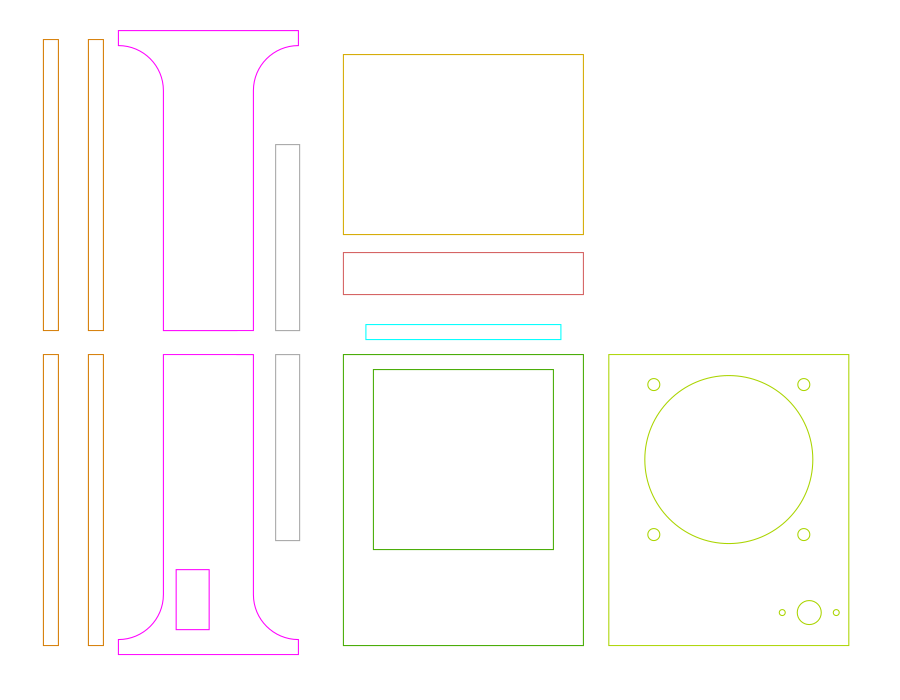
You can get the vector design (in both dxf and svg) here: Soldering Fume Extractor Case (DXF, SVG)
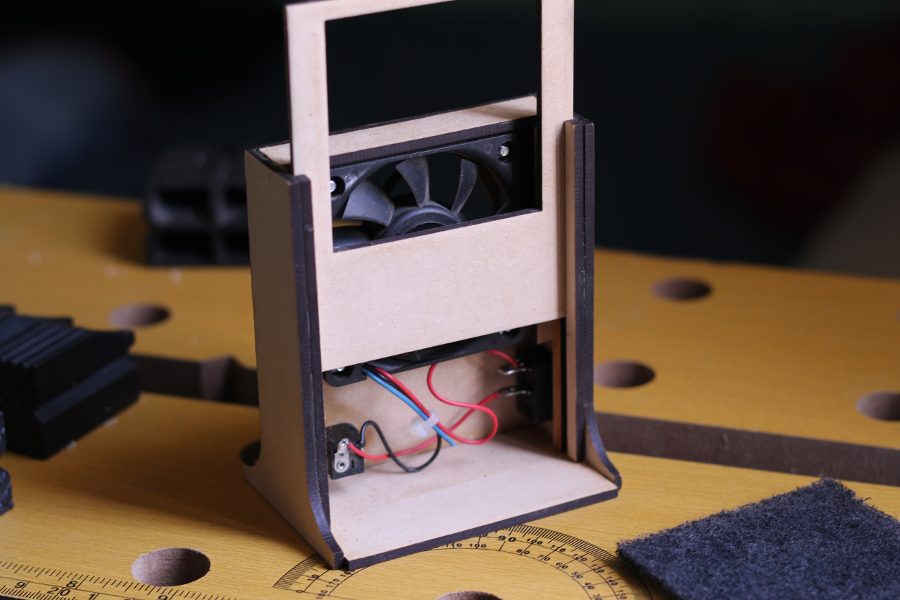
I guess the only confusing part from the design is the bunch of thin and long rectangles, so I’ll explain their function, which you can hopefully see in the pictures of the assembled extractor. The 4 longest pieces (outlined in a brownish color in the diagram) make the “sliding rail” for the front (filter) panel. The two shorter and slightly thicker rectangles (grey) are glued to the “rail” to provide a “stop” for the filter” so it doesn’t go straight into the fan obstructing the blades (although given the thickness of the fan I’m using they barely create like a 0.2mm gap making them 90% pointless). The final (and smaller) rectangular piece (cyan) is glued to the inside face of front panel and it provides a vertical stop for the filter once installed.
If your fan is not particularly thin you may need to make the whole structure (left, right, bottom and top pieces) wider.
I used a CNC laser cutter to cut the pieces, but I guess a CNC router would also work. You’ll inevitably get a “rounded” filter window and a rounded slot for the switch that you’ll need to sand/file down to make it fit, though.
Alternatively you could also use a small hacksaw and a drill coupled with a lot of patience, and a steady hand (which I don’t have).
The case was put together using Wood Glue (Polyvinyl Acetate, or PVA) and the fan was mounted with M3 bolts + nuts. The DC barrel jack is set in place by 2mm screws (For some reason when I rescued it from wherever it was installed first, I also took the screws with me).
You can see in the pictures that I made a small mistake with the base, and it’s like 2 extra millimeters longer front and back. This has been corrected in the drawing.
The “electronics” are pretty simple, although they could be improved with at least a protection diode and perhaps a capacitor for a smoother start/stop of the DC motor. Hopefully this is the last soldering job I had to do without a extractor.
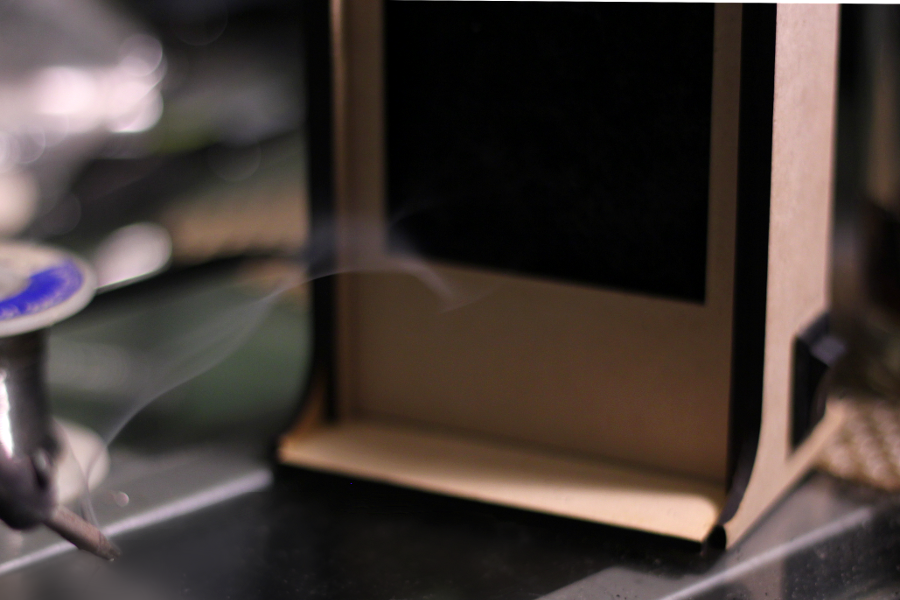
Anyway, the finished product works beautifully, and it makes soldering so much better. Seriously, when you’ve been soldering for a relatively long time, you start developing a sort of “reflex” for “dodging” fumes the moment they form at the tip of the soldering iron without even thinking (normally with little to no success), so my brain was genuinely confused when I tried soldering near the extractor. Fumes where coming nowhere near my face so for the first time I didn’t have to move my head or hold my breath to have a clear look at what I was doing and was able to truly focus on the job.
I strongly recommend you to build one!
EDIT: I’ve made an improvement to this project, and I’ve written a short post about it.


Great job! This is a straightforward approach to solving this problem, and will be great for our school MakerSpace and a quick cut for our Epilog laser.
Thank you!
Cool! I really hope you and other members of the MakerSpace enjoy the final product.
The unit is quite simple in design so it makes a good one-day project. It should also be quite easy to modify if something needs to be tweaked for your use, or for the materials you have at your disposal.
Thanks for your post! It’s always great to hear from people enjoying the things I’ve done/designed.
Have a great weekend.